Machine vision inspection utilizes advanced cameras and AI algorithms to detect surface defects and ensure product quality in real-time, enhancing precision and reducing human error. Eddy current testing employs electromagnetic induction to identify material flaws and measure conductivity, making it essential for non-destructive testing of metals. Explore the benefits and applications of these cutting-edge technologies in modern manufacturing processes.
Why it is important
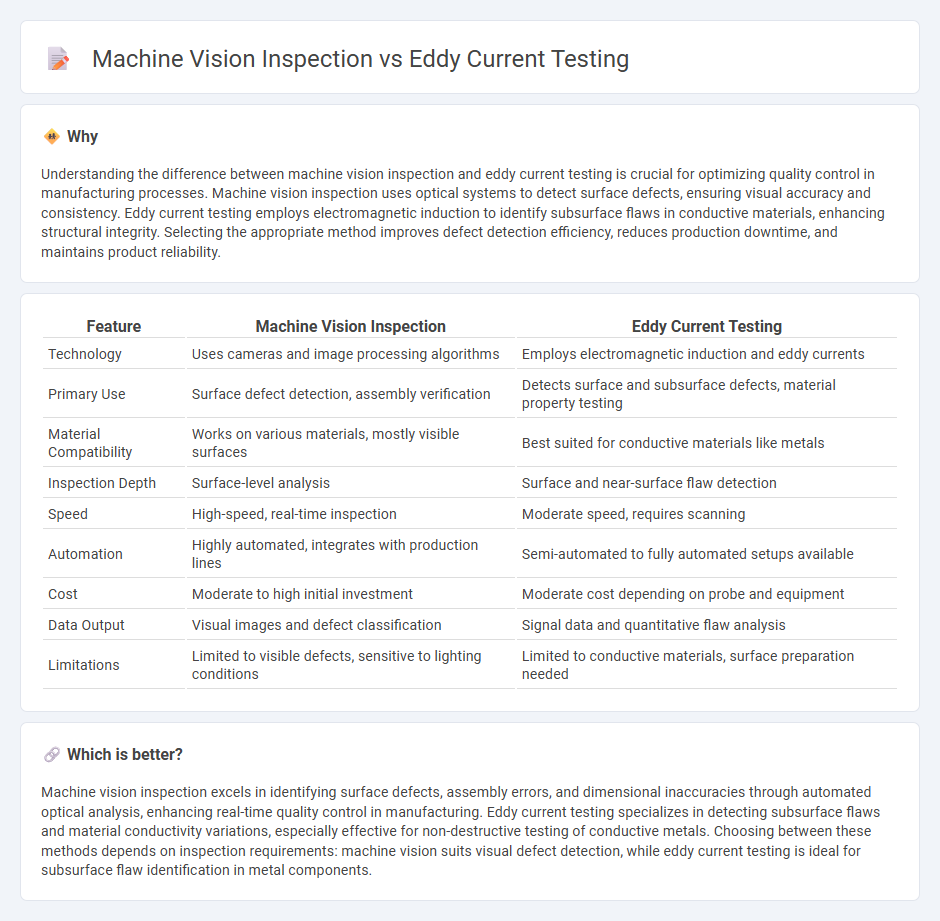
Understanding the difference between machine vision inspection and eddy current testing is crucial for optimizing quality control in manufacturing processes. Machine vision inspection uses optical systems to detect surface defects, ensuring visual accuracy and consistency. Eddy current testing employs electromagnetic induction to identify subsurface flaws in conductive materials, enhancing structural integrity. Selecting the appropriate method improves defect detection efficiency, reduces production downtime, and maintains product reliability.
Comparison Table
| Feature | Machine Vision Inspection | Eddy Current Testing |
|---|---|---|
| Technology | Uses cameras and image processing algorithms | Employs electromagnetic induction and eddy currents |
| Primary Use | Surface defect detection, assembly verification | Detects surface and subsurface defects, material property testing |
| Material Compatibility | Works on various materials, mostly visible surfaces | Best suited for conductive materials like metals |
| Inspection Depth | Surface-level analysis | Surface and near-surface flaw detection |
| Speed | High-speed, real-time inspection | Moderate speed, requires scanning |
| Automation | Highly automated, integrates with production lines | Semi-automated to fully automated setups available |
| Cost | Moderate to high initial investment | Moderate cost depending on probe and equipment |
| Data Output | Visual images and defect classification | Signal data and quantitative flaw analysis |
| Limitations | Limited to visible defects, sensitive to lighting conditions | Limited to conductive materials, surface preparation needed |
Which is better?
Machine vision inspection excels in identifying surface defects, assembly errors, and dimensional inaccuracies through automated optical analysis, enhancing real-time quality control in manufacturing. Eddy current testing specializes in detecting subsurface flaws and material conductivity variations, especially effective for non-destructive testing of conductive metals. Choosing between these methods depends on inspection requirements: machine vision suits visual defect detection, while eddy current testing is ideal for subsurface flaw identification in metal components.
Connection
Machine vision inspection and eddy current testing are connected through their complementary roles in manufacturing quality control, where machine vision provides rapid, non-contact surface defect detection, and eddy current testing offers precise subsurface flaw identification in conductive materials. Integration of these technologies enhances defect detection accuracy, reduces inspection times, and ensures higher product reliability in industries such as aerospace, automotive, and electronics. Combined deployment supports real-time monitoring and data analytics, driving optimized manufacturing processes and reducing costly rework or recalls.
Key Terms
Electromagnetic Induction
Eddy current testing utilizes electromagnetic induction to detect surface and sub-surface flaws in conductive materials by generating localized currents and measuring their interaction with defects. Machine vision inspection relies on optical sensors and image processing to identify surface anomalies without direct electromagnetic interaction. Explore the unique benefits of electromagnetic induction in nondestructive testing to enhance your quality control methods.
Optical Imaging
Eddy current testing utilizes electromagnetic induction to detect surface and near-surface defects in conductive materials, while machine vision inspection employs optical imaging to capture and analyze visual surface features for quality assessment. Optical imaging in machine vision offers high-resolution, non-contact inspection capable of identifying surface anomalies such as cracks, scratches, and corrosion with precise image processing algorithms. Explore in-depth comparisons between eddy current testing and optical imaging techniques to optimize your inspection strategy.
Defect Detection
Eddy current testing excels in identifying surface and near-surface defects such as cracks, corrosion, and material thinning by generating induced currents that detect changes in electrical conductivity. Machine vision inspection offers high-speed, non-contact evaluation of surface defects including scratches, dents, and misalignments through image analysis, color detection, and pattern recognition. Explore the strengths and applications of these technologies to determine the optimal defect detection solution for your industry.
Source and External Links
Introduction to Eddy Current Testing - Evident Scientific - Eddy current testing detects surface and near-surface defects in conductive materials by analyzing changes in a coil's electrical impedance caused by electromagnetic induction and the resulting eddy currents.
Eddy Current Testing - TWI - This non-destructive inspection method identifies flaws, material variations, or thickness changes in conductive materials by measuring alterations in induced eddy currents and their corresponding magnetic fields.
Eddy-current testing - Wikipedia - Eddy current testing uses alternating magnetic fields to induce currents in conductive materials, with detected impedance changes in the probe coil revealing surface flaws, though deeper defects require specialized techniques like Lorentz force eddy current testing.
 dowidth.com